1. Quick Start Guide
Welcome to the online Quick Start Guide for the 5G-IIoT Gateway. Here you will find an overview of the hardware installation instructions, device specifications, essential safety information, and an initial setup guide. Familiarizing yourself with this guide before using the device is advised to ensure a seamless setup process.
1. Safety information
Before proceeding to use the device, it’s essential to review the safety information provided in the Safety information section of the user manual. This section outlines important guidelines and precautions to ensure your safety and the proper functioning of the device. Taking a moment to familiarize yourself with this information will help prevent accidents and ensure a smooth user experience.
2. General information
Technical information about the device can be found in the Device description page.
| Power supply: | 5-36 VDC |
| Idle electrical consumption Main unit: | 2.5W(24V) |
| Idle electrical consumption Main unit + 1x Energy Meter unit: | 3.0W(24V) |
| Max electrical consumption: | 20W |
3. Hardware setup
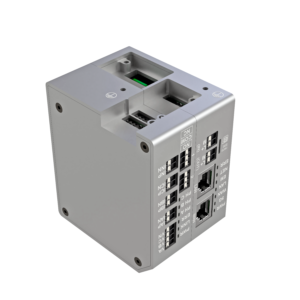
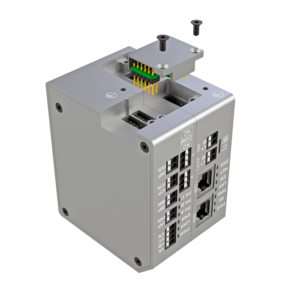
3.1 Connect the modules
First, connect any required hardware modules via the enclosed bridge connector part, as shown in the following images.
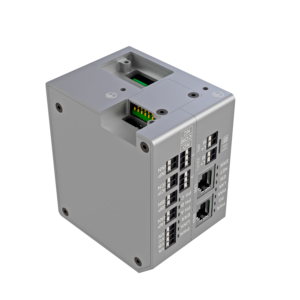
3.2 Power the device
Connect the device to a 5-36 VDC power source via the IN power terminals. The OUT terminals can be used to power multiple devices in a chain by connecting the powered device’s OUT terminals to an unpowered unit’s IN terminal.
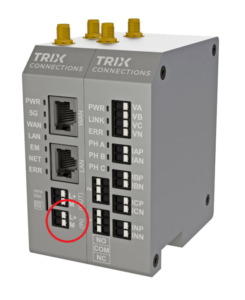
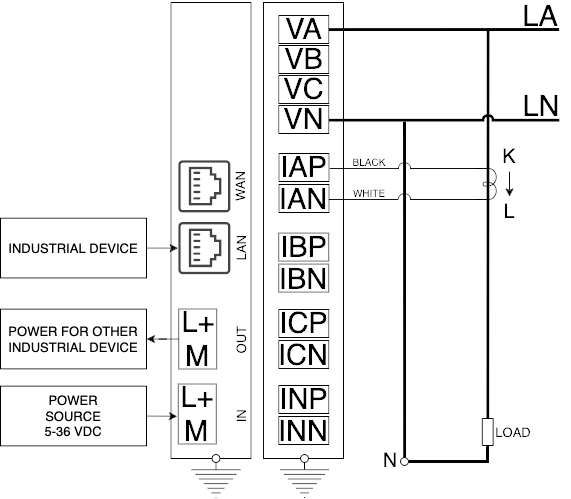
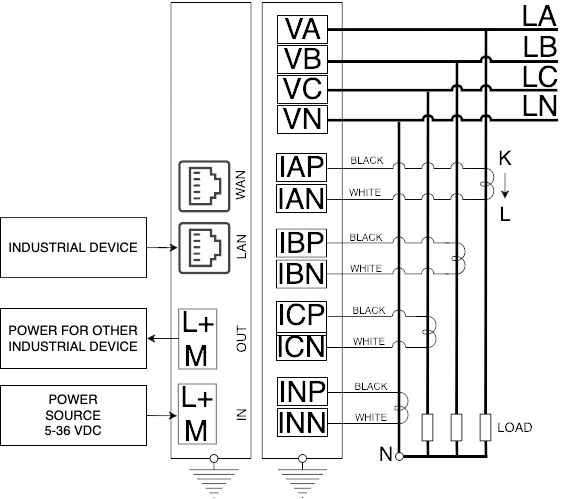
3.3 Connect the sensors
When using the Energy Meter unit, connect it using one of the following schemes.


4. Connecting to the device
Connect the device to your computer with an Ethernet cable via the LAN port.
4.1 Troubleshooting (Windows)
4.1.1 Enabling your Network Adapter
Make sure your network adapter is enabled:
1. Open the “Control Panel” from the Start menu.
2. In the Control Panel, navigate to “Network and Internet” or “Network and Sharing Center.”
3. Click on “Network and Sharing Center.”
4. In the left pane, select “Change adapter settings.”
5. Here, you’ll see a list of network connections. Right-click on the disabled network adapter you want to enable.
6. Choose “Enable” from the context menu. Alternatively, you can also click on the “Enable” option in the toolbar.
7. Once enabled, the network adapter icon will change to indicate an active connection.
4.1.2 Enable automatic IP address acquisition
To configure a Windows computer to obtain an IP address and DNS server address automatically, follow these steps:
1. Open the “Control Panel” from the Start menu.
2. In the Control Panel, navigate to “Network and Internet” or “Network and Sharing Center.”
3. In the left pane, select “Change adapter settings.”
4. Right-click on the network connection you want to configure and select “Properties” from the context menu.
5. In the Properties window, scroll down and select “Internet Protocol Version 4 (TCP/IPv4)” and then click on the “Properties” button.
6. In the IPv4 Properties window, ensure that the options “Obtain an IP address automatically” and “Obtain DNS server address automatically” are selected.
7. Click “OK” to save the changes and close the windows.
8. You may need to restart your computer or reconnect to the network for the changes to take effect.
Your Windows computer will now automatically obtain an IP address and DNS server address when connected to the network.
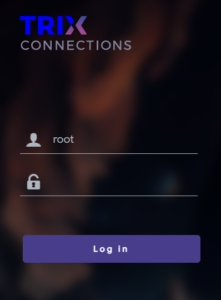
5. Log into the device
To access the web user interface (UI), enter the default LAN IP address http://192.168.0.1 into the URL field of your preferred browser. This action will direct you to the login page of the web UI. Utilize the login credentials found on the device’s information label to log in and access the UI.
6. Next steps
Explore the remainder of the documentation to learn how to use the web UI to configure your device, including instructions on changing your default password found in the passwords section.